> For the complete documentation index, see [llms.txt](https://docs.responso.com/responso-doc/llms.txt). Markdown versions of documentation pages are available by appending `.md` to page URLs; this page is available as [Markdown](https://docs.responso.com/responso-doc/en/functions/advanced-signatures.md).
# Advanced Signatures
Advanced signatures will automatically appear under every message sent from the system. Signatures can be assigned separately for each inbox or all simultaneously. Each agent can have a separate signature created by the agent and system administrator.
Do you have many redirected email addresses to Responso? Each of these addresses requires a different footer? Or maybe you need a signature in different languages – you will do it with this functionality.
You can add signatures by simply inserting HTML code, or using the editor to add your footer with a photo.
To make adding signatures easier, we have also added two standard patterns that you can immediately use for your configuration.
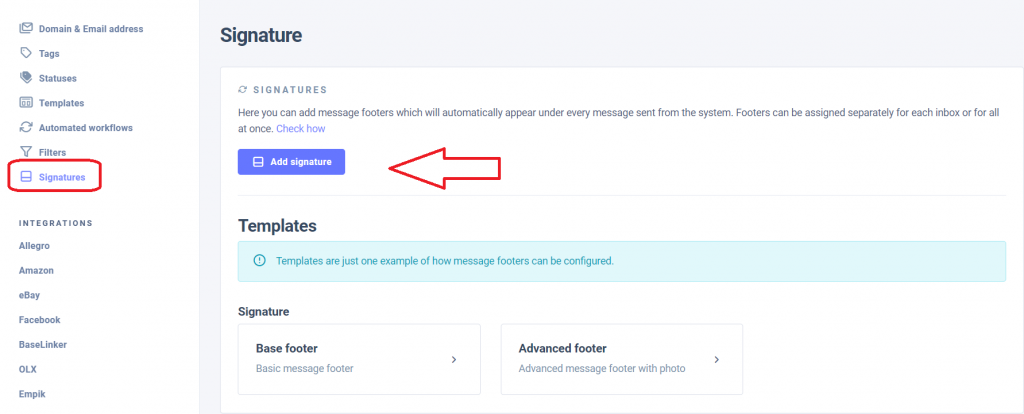
To add a message footer, you have to go to **settings** -> **signatures**
\
Then you have to click one of the ready-made templates or simply create a new one by clicking the “**add signature**” button.
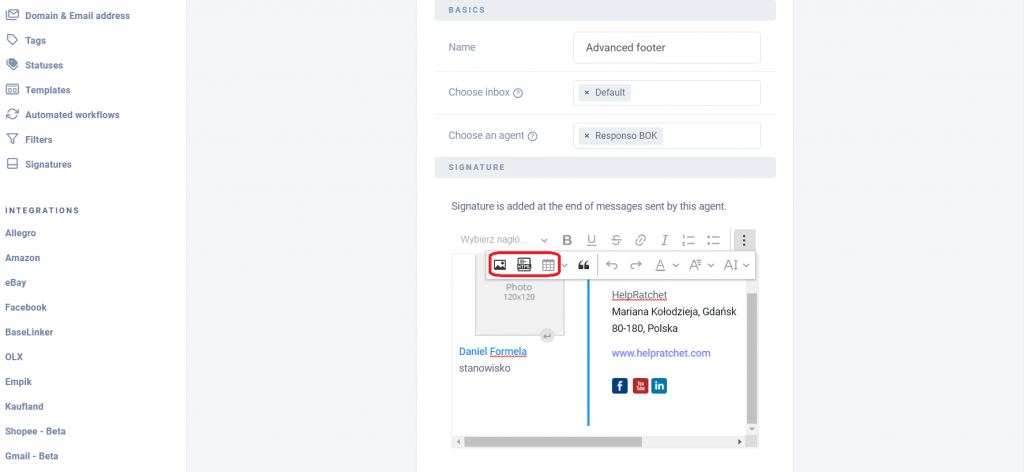
While we are adding signatures, we can use the menu that allows you to add a photo and embed it in the text.\
To place the text well, we can use a table that allows for any division along with the configuration of the color of the edges. Additionally, we can just embed HTML code.
As the system administrator of the signature, we can add it for all agents, or simply everyone can add the footer on their own. Agents can only create their own footers.
\
The inbox configuration allows you to add one footer or for all of them at once.
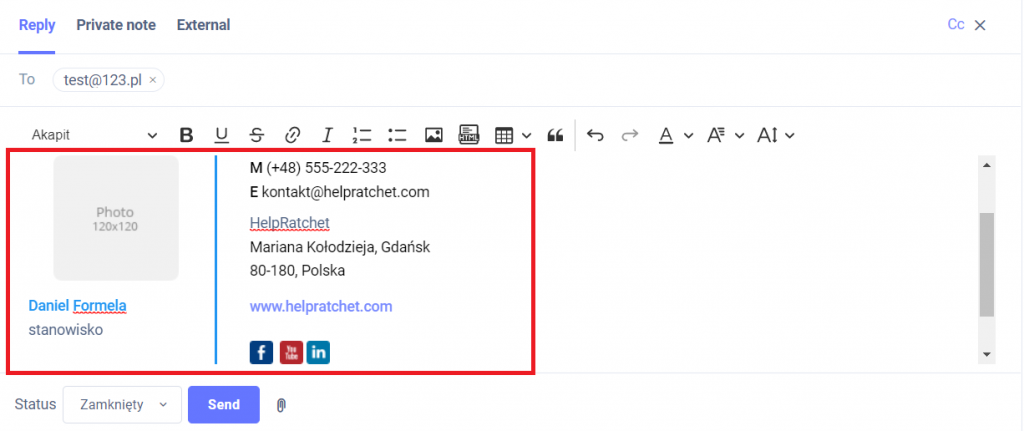
After saving the signature, we can start using it. All we have to do is go to the message we want to reply to. After clicking in the answer field, the signature will be added automatically.
In the video below, we’ve outlined the entire process of adding a new footer.
{% embed url="" %}