Integration with BaseLinker
Last updated
Last updated
The integration allows you to retrieve order information from BaseLinker, which is then assigned and displayed in the appropriate tickets in Responso.
The steps below are also supported by videos provided further down.
Log in to your BaseLinker account.
From the left menu, select the Integrations tab, and then click the Add Integration button.
In the search bar, type Responso, and then click the appropriate tile.
Click Activate.
Close the window confirming the integration, hover over your account name in the top right corner, and click My Account.
Go to the API tab and in the Your API Token section, click Copy to Clipboard.
Log in to your Responso account.
Click the Add Channel button in the top right corner.
Select BaseLinker.
In the window that appears, add a name for the integration and paste the previously copied API token from BaseLinker. You can also decide whether Responso should display shipping labels for orders retrieved from BaseLinker (this option can be configured later as well).
Click Create.
Your BaseLinker and Responso accounts are now integrated.
After successfully adding the BaseLinker account, order information from the past three months will begin to sync. Current orders are typically retrieved every 5 to 10 minutes.
To enable Responso to link customer messages with order information from BaseLinker, it is also necessary to integrate the email inbox that receives BaseLinker notifications with Responso.
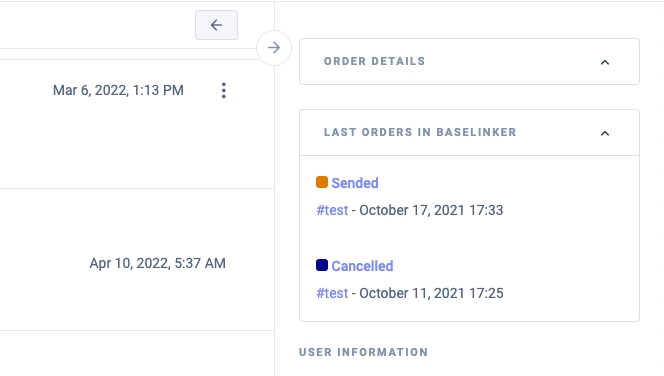
After integrating with BaseLinker, a collapsible BaseLinker Orders tab will appear on the right side of the message view in Responso. If the Responso system finds related orders for a given ticket in BaseLinker, the order details will be displayed here. Clicking on the order information will open a new tab with that order in the BaseLinker panel.
Responso also allows you to view archived orders. If any archived orders are associated with the ticket, the option Show Archived Orders will appear in the BaseLinker Orders tab.
In the ticket view, on the right side, in the Order Information section, you can manually change the order status in BaseLinker by selecting the appropriate option from the dropdown list. This change made from Responso will trigger the actions assigned to the selected status in BaseLinker. The list of available statuses matches the statuses in BaseLinker.
Among the automatic actions available in Responso, there is one that allows for the automatic change of an order's status in BaseLinker, linked to a specific ticket in Responso. Currently, this function works only for the following conditions: ticket source is Responso returns, and the ticket type is return. However, there are plans to extend this functionality to other conditions.
In the ticket view, on the right side, in the order information section, we have added the ability to download a label associated with a specific order or return. You can also add the label as an attachment in a message to the buyer with a single click.
To enable this feature, go to the BaseLinker integration and toggle the switch next to Show Shipping Labels for Orders.
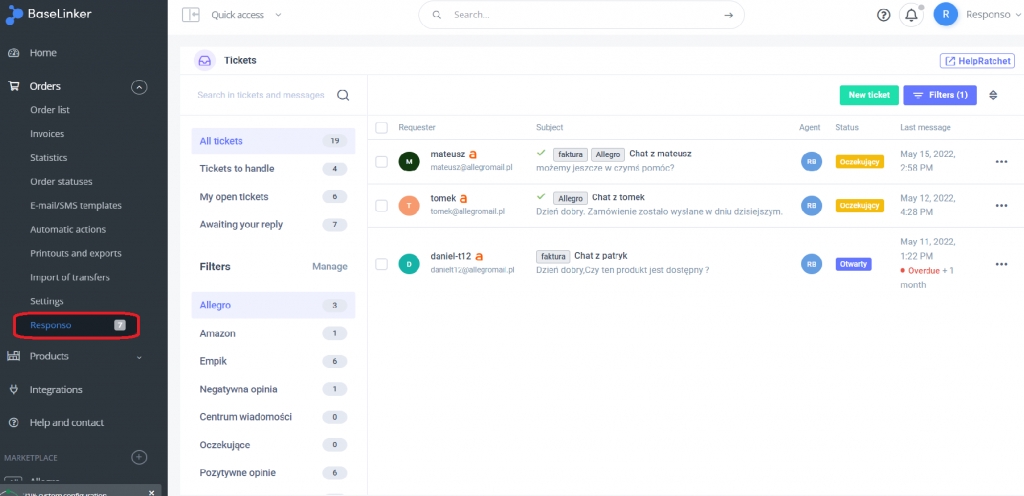
With the integration of Responso, you can extend the functionality of BaseLinker. After connecting the two platforms, you will have access to the Responso inbox directly within the BaseLinker panel. The Responso plugin will appear in the Orders tab on the left menu—no additional installation is required.
From within BaseLinker, you can browse the inbox, access tickets, respond to messages, and perform all other actions related to tickets. This means that from BaseLinker, you have access to all messages from various sources (all integrated with Responso).
Note: Logging into Responso from BaseLinker using Google Chrome requires enabling third-party cookies. You can check how to do this here.
When navigating from the Orders list in BaseLinker to a specific order, you can view the Responso inbox window with messages filtered to show only those related to that particular order. This allows you to quickly access and manage all communications associated with the selected order.
To make using Responso from within BaseLinker more convenient and tailored to your preferences, you can set a default filter for the inbox displayed in BaseLinker. This can be done in the agent account settings in Responso. By customizing the default filter, you can ensure that the inbox view in BaseLinker is aligned with your workflow and needs.